Last edited:7 December, 2004
Author: Karl Petersen
Illustrated by: Daniel Slagle
This site is NO LONGER being maintained for the "ALL NEW" site that talks about the new iMovie 11 please visit TheUnofficialiMovieFAQ.com
Overview
Normally the iMovie-exported movie plays everything
you want. But if you want to add an image that overlays the main
movie, this lets you do that. This image could be your website
name, a permanent title, copyright information, etc...
QuickTime Pro lets you build a "sandwich" of video
tracks so one track plays on top of the other. We use that feature
to build a 2-layer sandwich, where a still image plays on top of
the iMovie video. The still image is smaller than the video layer,
so it plays over it.

Resolution Steps
1. In any graphics program (AppleWorks, Photoshop), create an
image that's the size you want displayed in the video. Since
the DV video is 720x480 (NTSC), the image would normally be
smaller than that. If the image is text, you should CROP the
image to the desired size, not resize the image, for cropping
preserves the original quality while resizing reduces quality. Save the
image and close the image window.
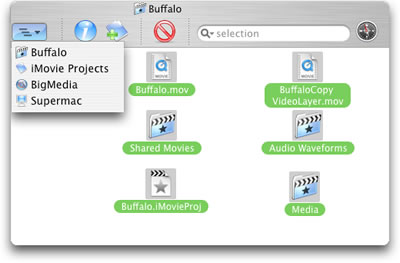
2. Close iMovie and in the Finder, open the iMovie project folder.
Inside it is the project.mov, a movie with the same name as your
project, with the suffix ".mov". Duplicate that file (in
the finder you can control click copy - control click paste). Double-click
the duplicate to open it in QT Player. (From now on, we'll refer
to this as the video layer.)
To avoid resizing the image portion of the movie later, we first
change the image size of the movie to 640x480. To do that, in Quicktime
choose Movie > Get Movie Properties (Command-J). In the left
pop up menu, choose Video Track. Choose Size in the right pop up
menu. Click Adjust. The image will acquire red markers. Click in
the movie window to activate it, click on the image, then drag the
red marker in a corner to 640x480. Click in the properties window,
then press Done. When complete it should look like this: 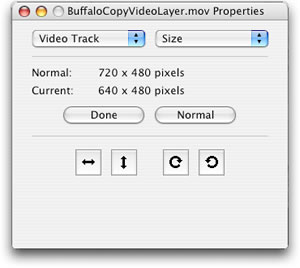
3. In QuickTime Player, open the image file. (It opens as a single-frame
movie.) Choose Edit > Copy, which copies the image to the Clipboard.
Close that window.
4. The next step pastes the image as a new layer over the video
layer, while at the same time forcing the image to match the play
time of the frames you've selected in the movie.
Activate the video window. In Quicktime select the frames where
you want the image to go. Using the little arrows on the slider
bar, 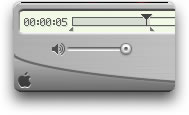 then
choose Edit > Add
Scaled.
then
choose Edit > Add
Scaled.
5. Press the left arrow key to move back one frame. The image
will appear over the video. Now we need to resize/reposition the
image.
First, move the playhead to the first frame of the image. Choose
Movie > Get Movie Properties. In the left pop up menu, choose
Video Track 2 (our image). Choose Size in the right pop up menu.
Click Adjust. The image will acquire red markers. Click in the movie
window to activate it, then drag the image to where you want it
in the window. You can press arrow keys to move it a few pixels.
When it's right, press the Done button. (Don't worry about flickering.)
It should look similar to this:
6. Select Video Track 2 in the left pop up menu, select Quality
in the right pop up menu. Check the boxes High Quality and Deinterlace
Fields. Uncheck Single Field. Repeat for Video Track 1 if High Quality
is not already enabled.
7. Save. If this is the movie format you want, save as a self-contained
movie. Otherwise export to a movie with the desired format.